1. Chapel Side Room
2. Chapel
3. Chapel Bath Room
4. Car and Motel Exterior
5. Studio Gates
6. Gatekeeper's Office
7. Secretary's Office
8. Executive Boardroom
9. Chess/Script Room
10. Doctor's Exam Room
11. Doctor's Office
12. Doctor's 1:1 Room
13. Wig Room
14. Seamstress's 1:1 Room
15. Studio 5
16. Seamstress's Workroom
17. Cinema
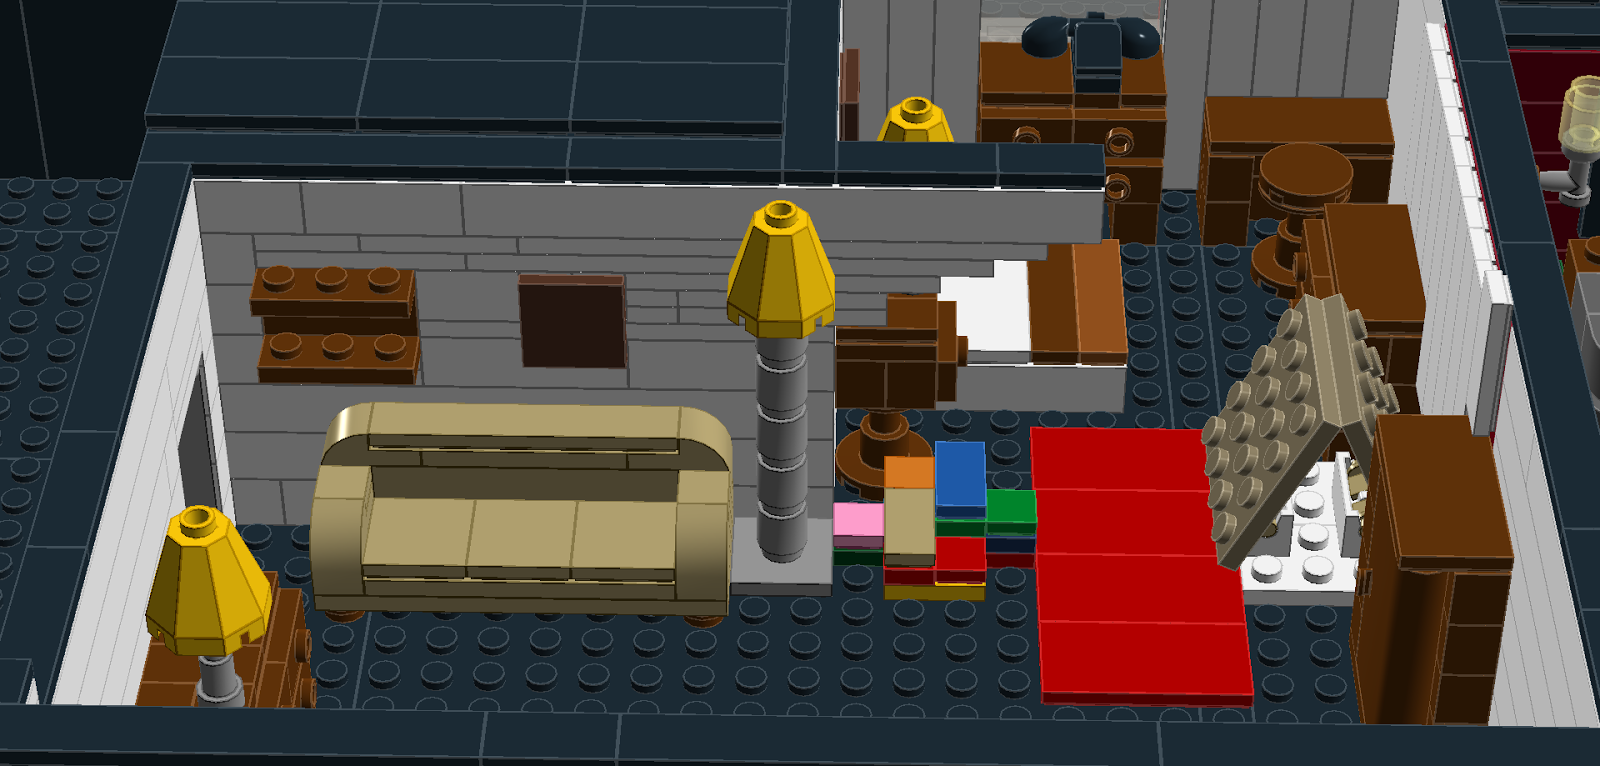
18. Buchanan's House
19. Small Motel Rooms
20. Faye and Harry's Room
21. Motel Office
22. Grocer's Shop
23. Grocer's 1:1 Room
24. Seamstress's Shop
25. Drugstore
26. Psychic Shop
27. TV Repair Shop
28. Romola's Shrine
29. The Arcade
30. Tuttle's Toy Shop
31. Tuttle's 1:1 Room
32. Saddlery
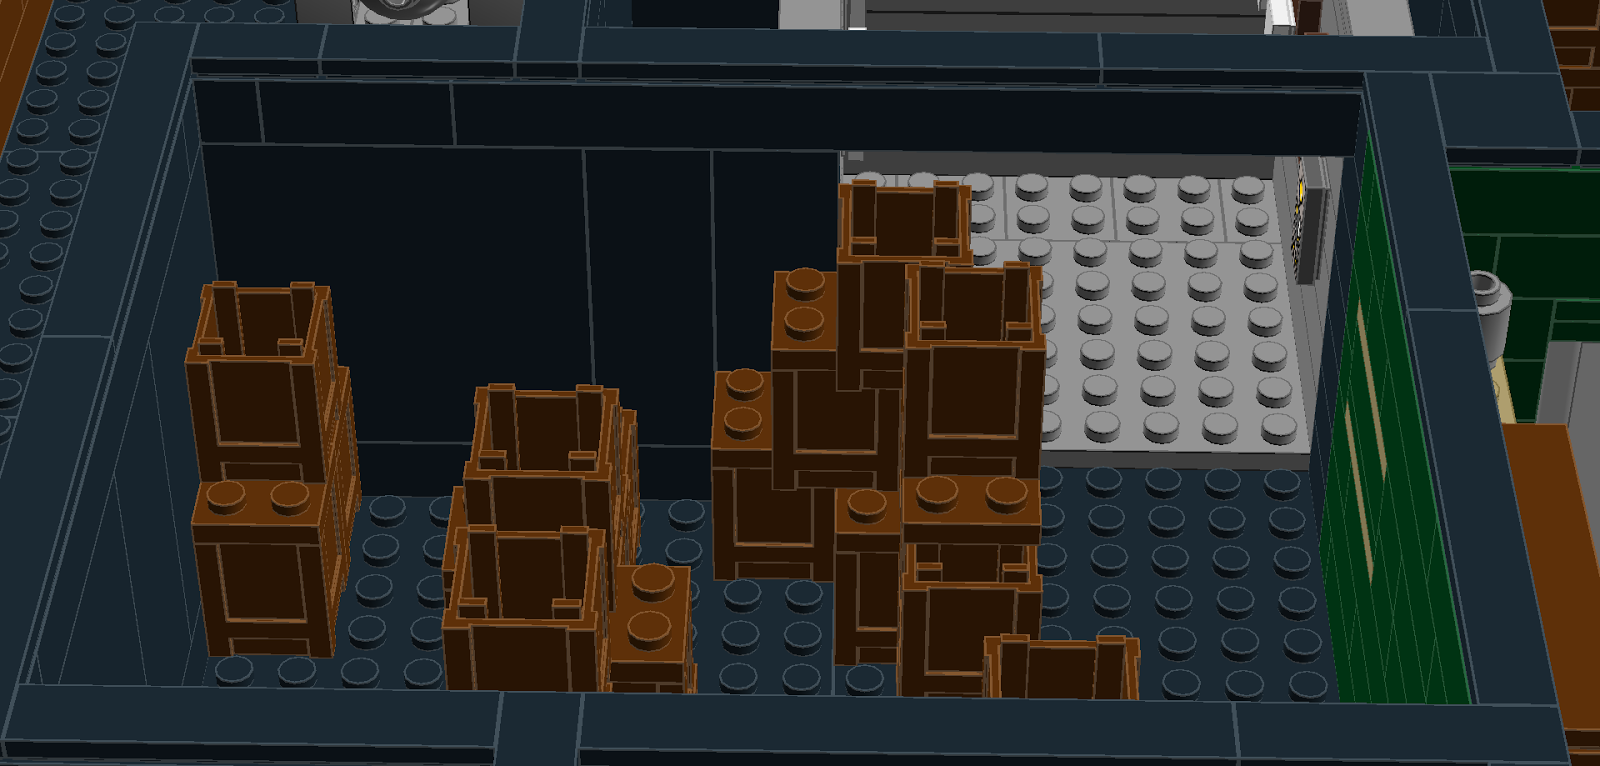
33. Games Room
34. Box Maze
35. Back of Motel
36. Romola's Caravan
37. Mossy Caravan
38. Dwayne's Caravan
39. Badlands Jack's Caravan
40. Trailer Park Exterior
41. Badlands Jack/Andy/Barman's 1:1
Area
42. Forest
43. Horse and Stars
2. Chapel, 1. Chapel Side Room, and 3.
Chapel Bath Room
The only one of these rooms that
actually has a scene take place within is the bath room, where the
Dust Witch bathes Dwayne at reset time. The whole chapel area is
definitely a presence in general, though, which is why I'm including
that exterior shot – it's what comes to mind when I think of it.
The light-up cross above the doorway is created by negative space
with a translucent yellow piece behind it, rather than being
something that I attached to the wall – so if you were to shine a
light through it, you'd theoretically get the same effect that Mary
sees when she's outside doing her dance of shame.
4. Car and Motel exterior
I'm not super-thrilled with how the car
turned out – it almost looks more like a pickup. But there's not
much room to extend the slope of the rear without making the car
longer or losing the trunk, and the actual vehicle doesn't have much
slope there anyway (it's just one of those things that got magnified
when translated to LEGO form). The design also suffered a bit for
needing to have opening doors – but I was unwilling to sacrifice
those, since the driver's side spends more time hanging open than it
does closed. Due to the difficulty of squeezing the virtual camera
into limited spaces, this is also the best look at the porch that
you're going to see. I did experiment with suspending the porch
swing from the awning, but nothing really worked well, so I settled
for setting it on a transparent block. The black wall behind the
boxes at the end of the street has a massive “Tunnel of Love”
mural painted on it.
5. Studio Gates
The iconic entrance to the studio.
This part actually came out much closer to the real thing than I
thought I'd be able to do. At one point, before I realized I could
mount the horses at an angle, I toyed with building them out of
smaller pieces, which would have been an absolute nightmare and
probably wouldn't actually have looked like anything. These horses
aren't a great match for the actual statues, but they are clearly
horses. So that's a plus. The two horizontal panels under the lights should, of
course, say “Temple” and “Studios”
6. Gatekeeper's Office
So long and narrow, so difficult to
record an image of. This is one of those rooms for which a lot of
the detail falls under the category of “stuff on shelves,” which
is always tough because the space for building the objects is
extremely limited. The tan and black panels on the wall by the lamp
are a map and a directory chalkboard, respectively.
7. Secretary's Office
This was the first room I built – my
proof of concept, as it were. I started with this one because I
found a very clear, well-lit, head on photograph of it, so it seemed
like a nice easy one to test the process out. I haven't actually
changed anything in here since then, other than trimming the walls
(when I started out, I was using 8 bricks as the standard height) and swapping out my original too large doors for the currently-standard too small ones.
This was where I first really learned just how much I would need to
simplify things – each half of that desk also contains two phones,
a name plate, a pencil holder, multiple piles of paper, and assorted
bits and bobs – but trying to fit anything else on there would be
disastrous (I might have gotten away with the name plate). Still, I
think the idea comes across pretty well, and this process served as
the model, essentially, for the rest of the project.
8. Executive Boardroom
Although it's really just one big room,
this is, in every practical sense, two rooms. The big, empty side
with the table and the side with the stage. There's really nothing
to the table half of the room – just the big table itself, which
serves as a sort of stage for several impressive solo and duet
dances. The other half of the room is much more interesting, though,
with the 2-way mirror in to the Buchanan house, the big pile of curio
cabinets, and of course, the stage – home to one of my favorite
numbers, the Codfish Ball. That basket at the back of the stage
contains a taxidermy baby deer, which I couldn't build at this
scale. More recently a pedestal has been added so that the deer sits
closer to the level of the railing, but I prefer it this way, how I first saw it.
9. Chess/Script Room
I've only been inside this room once,
but there's not a tremendous amount to it unless you want to delve
into the contents of the pile of scripts. Mostly just large, empty
space.
10. Doctor's Exam Room
Another greatly simplified room –
those metal stands on either side of the desk are filled with all
sorts of interesting, tiny bits that I couldn't build at this scale. Behind the
examination stage you can see a window into the cinema – in
actuality it's not transparent like that. It's a screen that becomes
somewhat transparent in one direction or the other depending on the
lighting. Said screen also has a set of dark curtains that can be
drawn across it, which I have omitted from the model. There are also really five of those booths at the back of the room in real life, but as you
can probably see, there's no way I was going to squeeze two more of
them in there.
11. Doctor's Office and 12. Doctor's
1:1 Room


There are quite a few modifications that I had to make to the Doctor's office. That weird brown
shape near the door is actually more of a hollow, frame-like
structure, maybe a coat rack of some sort? Above the desk you can
see several pairs of eyes in frames – the real ones are, of course,
much smaller, and there are several pairs of eyes in each frame. The
two big white panels are medical diagrams – a human eye, a fish,
and a cat. You may notice that I just listed three of them – there
should be a third diagram somewhere in the room, but I don't actually
remember where it goes. The real bird on top of the cabinet is black
and stands on a white branch, but that particular bird piece only
comes in white – so I also inverted the branch color in order to
maintain the color balance. Over in the 1:1 room, things are fairly
sparse. The most memorable features are the infamous eye chart
beside the door and all of the smaller inkblots hanging on the wall,
which no one who has been embarrassed by this talky 1:1 will ever
forget.
13. Wig Room and 14. Seamstress's 1:1
Room


The Wig Room is another room that
exists purely for atmospheric purposes – no character ever sets
foot in there. The colored tiles on the side wall represent clumps
of hair hanging there – if memory serves, they're not full wigs.
The shelf on the wall near the mirror should contain more heads with
wigs, but in order to fit them on there, I would have had to make it
bigger than I felt comfortable with, so just imagine them there. The
Seamstress's 1:1 room is probably the biggest victim of wall color
issues in the whole model. The actual room is sort of a light olive
green, which doesn't really have a good match in the world of LEGO
pieces. I used a (much too light) green-grey for two walls, but
logistical concerns forced me to stick with the colors of the
adjacent spaces for the other two walls – so just imagine all of
the walls are the same color, and that color is not any of the colors
you see here. Sorry, you can't win them all. In the first picture, you can see the waiting area in the hallway right outside, complete with (Non-functioning! Treachery!) water cooler.
15. Studio 5
I'm very proud of this room. As I've
mentioned in a few other places, LEGO does not do diagonal well. The
sets on stage, however, are all about the odd angles. So it was
pretty satisfying when I actually managed to make the structure work
(although if you look closely, you can see one point where I cheated). The color of the stripes in the bedroom set was the
source of much controversy during the research phase of the project.
I started out thinking the non-white stripes were yellow, but others
told me they were pink. In actuality, they're a yellowish-tan
background with pink flowers. So kind of both. I stuck with yellow
because the yellow-tan is the dominant color, but I didn't want to
use tan because it would look too much like the kitchen set. Also,
on the bed, you can see another example of the restrictions of using
only real pieces – the curved bits on the side don't come in dark
blue, so I had to cheat them with black ones.
16. Seamstress's Workroom
This is a heavily simplified room –
it's just full of little tiny bits. For some reason, I'm
particularly pleased by the two little sewing machines, and very
grateful that LEGO actually produces a chicken piece. As for the
clothes maze. . . everything I've come across indicates that this is
the layout, and my memory tells me that it's definitely something
like this – but when you're in there, it just feels so much longer
and more complicated. The colored stripes on the wall are bleeding through from the Drugstore, not something that actually exists in the maze. The second image also gives you a glimpse of the photos of the stars of Temple Studios, hung up on the wall in front of the waiting area.
17. Cinema
When I first heard rumors of what you
might find on set, this is the one that blew me away the most, even
more so than the desert. An actual, working cinema inside the show!
Madness! Of course, it's actually a very tiny cinema, but still
impressive. The screen provides a view of the Doctor's examination
room, resulting in by far the skeeviest moment of the entire show.
All of those flat panels are, of course, movie posters, and the
marquee above the door reads “Eyes Without a Face.” This was one
of the rooms I first built early on in the process, when I was trying
to use sloped bricks to recreate the texture of the curtains on the
walls. The result was kind of cool, but took up way too much space,
so I don't for a second regret scrapping it in favor of what you see
here.
18. Buchanan's House
. . . or William and Mary's house, if
you don't dig too deep into things. Kind of an interesting case, in
that there's a decent amount of documentation of one portion of the
room, but the other half is more of a mystery. I'm pretty sure the
two chairs along the same wall as the front door should actually be
angled (or at least the one in the corner), but again, not sure. I
was really kind of guessing with some of the stuff at that end of the
house – it's not a space I spend much time in. Note the window
into the boardroom at the back – that's actually a two-way mirror.
19. Small Motel Rooms and 20. Faye and
Harry's Room
The large room belongs to Faye and
Harry, and I'm not really sure about the other two. One of them is
Andy's, and one of them may belong to Drugstore Girl (or so I've
heard, second-hand). Conrad takes up residence in the room on the
end at one point, just to further confuse the matter. Not a lot to describe about
these rooms; they're pretty simple – although I'm definitely
shortchanging the detail on them a bit. Bed sheet colors are a guess; I can't remember what any of them actually are, despite the massive amount of time I've spent in Faye and Harry's Room in particular.
21. Motel Office and 22. Grocer's Shop
These are both feel pretty close to
right, but there are a few inaccuracies. The Grocery's Shop has one
too many banks of shelves (I realized this when I returned to the show
after I first built it, but the room looks more right to me with the
shelves, even if it's not actually accurate - so I left it). The
motel office is missing the curtain between the front and back halves
(none of the options I tried felt right) and a tiny bookcase next to
the chair in the back corner, which I couldn't convincingly build to
fit in that space. The black bits on the wall in front of the
reception counter are mailboxes.
23. Grocer's 1:1 Room
This room feels much bigger than it
actually is – I'm amazed at how much they squeezed into this tiny
space. Somehow, that U-shaped path that you follow seems like it
must continue curling around into a spiral – but it doesn't. Not
much to say about the build – it's a bunch of boxes and some walls.
24. Seamstress's shop
The poor Seamstress. Yet another of
her rooms that suffers from having to adopt the wall colors of the
spaces alongside, because there isn't room to cover them up –
although that red wall kind of fits tonally, at least. Like most of her spaces, the
whole thing is filled with little fiddly bits that I couldn't
possibly replicate, but in this case, the majority of them are
organized into little jars, which helps.
25. Drugstore
This is my very favorite room in the
whole model (and one of my favorite rooms in the show). I feel like
that delicate balance between simplifying and recreating worked out
better here than anywhere else. It was also the only model that ever
(sort of, anyway) existed in real life – when I was working out the
scale of the model, I built a very rudimentary version of this room
out of spare parts to test it out. Note the secret tunnel in the
phone booth.
26. Psychic shop and 27. TV repair shop
A pair of essentially unused rooms
(Andy does pop into the psychic shop at the end of the show), so
there's not a lot to them. The psychic shop is yet another victim of
the “that piece doesn't come in that color” effect, as there are
no green hinged bricks, which were necessary for the angled wall (why
oh why did they build angled walls into this set?).
28. Romola's Shrine
Tucked away in a nook at the end of the
hall, we find a couple of crates, some plant matter, some candles,
and a photo of poor, dear Romola, taken too soon. Good night, sweet
princess.
29. The Arcade
This is a hugely impressive space, a
town exterior so expansive it actually kind of feels like it's
outside. In the first image you can see the TV repair shop and a bit
of the psychic shop, in the second the drugstore (sadly, I couldn't
make the sign take the shape of a cow), in the third Tuttle's Toy
Shop and the passageway to the Horse and Stars, and in the fourth the saddlery (with a hint of the motel and Grocer's shop in the
background). The gazebo should have some umbrellas rigged up inside
(for the photography set-up), but a) there wasn't room and b) there
aren't any really good options to represent umbrellas, as the PA's
1:1 room on the ground floor demonstrates.
30. Tuttle's Toy Shop and 31. Tuttle's
1:1 room.
The toyshop is jam-packed with things,
all sorts of tiny toys well below my scale. The interior walls are
actually a sort of dark green/dark blue, but due to all of the things built into the walls on both sides, I would have had to use
that color for a chunk of the Horse and Stars if I wanted to actually
go with it. Thus, I stuck with the brown for the interior walls. The
yellow chunk hanging up is meant to represent a large, sculpted
crescent moon. You can't really see it in these images, but there is
an opening behind the counter, which leads to the 1:1 room. The
walls in there are probably really all black, but I left the three different
colors intact for the sake of the areas that bordered it. After all,
who can actually tell when the lights are out?
32. Saddlery
This used to be Badlands Jack's domain,
but now not much goes on in there. The colored panels on the wall
represent various animal hides.
33. Games Room
Another room that has fallen into
disuse since the departure of Badlands Jack – but unlike the
saddlery, this one houses no action at all – or at least, no
performance action. There's plenty of gambling action to be had
within as, among other thing, the black wall behind the table is filled with chalk marks
relating to sports betting.
34. Box Maze
The entrance to the show – for half
of us, anyway. It's a much more interesting entrance than the one
from the other lift, although the other lift has the benefit of
getting you out on your own a bit quicker, if you happen to have a
destination in mind already. The walls should all be black - I'm allowing some bleed-through from the Grocer's here.
35. Back of Motel
. . . and here's that other lift, which
lets out into a field of trash, laundry, and cheap wooden furniture.
To the left, you can just see a bit of a not-quite-secret passageway,
down which the exec will occasionally direct a lone white mask,
allowing them to beat the crowd to the Horse and Stars
36. Romola's Caravan
Beginning our series of caravans, first
up is Romola's. The interior is completely awash with clippings from
magazines and ominous, scrawled notes. Even without Romola herself,
it's clear that this is not the home of a well person. In the latter
days of the show, the exterior has been largely cleared of such
notes, but I'll always remember it with them in place, so here they
are.
37. Mossy Caravan
Just a tiny, tiny, tiny space. So tiny
I had to create it as basically a box, rather than adding the slopes
that are a part of the other caravans. The important thing to note
about it is that everything is covered in moss – beyond that, what
else can you say about it? The layout is essentially accurate,
though, if slightly stripped down.
38. Dwayne's Caravan
Apparently some guy named Dwayne lives
here, although as far as I'm concerned, it's just where Romola does
her 1:1 and Faye dances in the door. Bedding colors are a guess,
since, like most people, my memory for details completely fritzes out
during 1:1's.
39. Badlands Jack's Caravan
The most bare and stripped down of the
caravans, this used to be home to Badlands Jack, though it was mostly
just used for his 1:1. To that end, the back opens up into a
hallway, which you can see just a bit of here. Those black cupboards
(which are actually supposed to be brown – limited color selection
strikes again) contain a little something special, but Jack said he'd
kill me if I told anyone.
40. Trailer Park Exterior
A few external views of the caravans,
so you can get at the environment as a whole – although I offer
only a slight glimpse of that ugly, ugly hut-like structure between
Dwayne and Romola's Caravans. The big black plate visible in the
second image is, of course, the Horse and Stars sign.
41. Badlands Jack/Andy/Barman's 1:1
area
This is where the door in Jack's
caravan leads. What I've built here is all supposition – anyone
who gets brought in here spends the whole time blindfolded. It used
to be Badlands Jack who brought you in; now it's either Andy or
the Barman (but not all Andys and not all Barmen, just to make it
confusing). Over by the exit door, which leads into the arcade, you
can see the rack of replacement masks – this is the only place
where you leave with a different mask than you came in with.
42. Forest
This is almost more of an alternate
view of the trailer park, but it does give you a look at the whole
mess of trees over there. Also, probably the best look at the fence
behind the motel, which I'm quite pleased with. And the weird hut
thing, which I'm. . . less pleased with.
43. Horse and Stars
Finally, here we have the home of the
most important moment in the show for me (Walking in the Sand) and
one of the most fun dance numbers (Hoedown!!!). The real back wall
is covered in many, many more skulls than what I've got there, and
they are in actuality much smaller. Also, there is sadly no place
for me to mount the chandelier or disco ball(!) that are actually in
there. The translucent pieces near the small stage represent strings
of Christmas lights, and over to the right in the second image you
can see the “secret” exit from Tuttle's 1:1 room.